How to Assign a Room Number to a Reservation
A. Introduction
A room can be allocated to a Reservation that is for any future date.
This is to ensure that:
· any requests the guest may have are fulfilled prior to check-in
· to ease the check in of a group
· the room type required is given
B. Individual Reservation
1. A Room is assigned to an individual’s reservation by completing the following steps
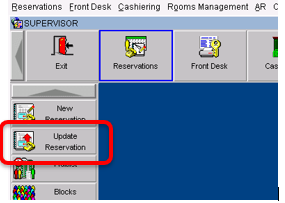
1.1. Reservations – Update Reservation
1.2. Search for the required reservation by entering one or more of the search criteria
a) Confirmation Number
b) Name
c) Date
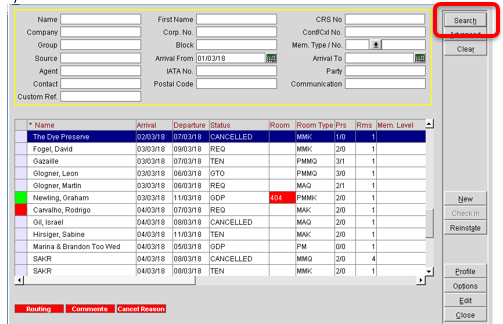
1.2.c.1. Click on Search
1.3. Highlight the reservation and Select Edit
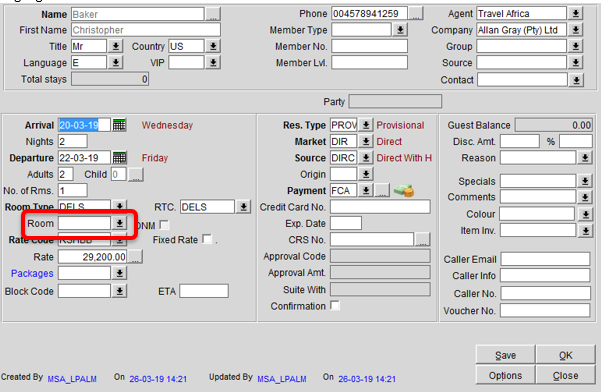
a) Tab to the ROOM field
b) Select the LOV for Available Rooms
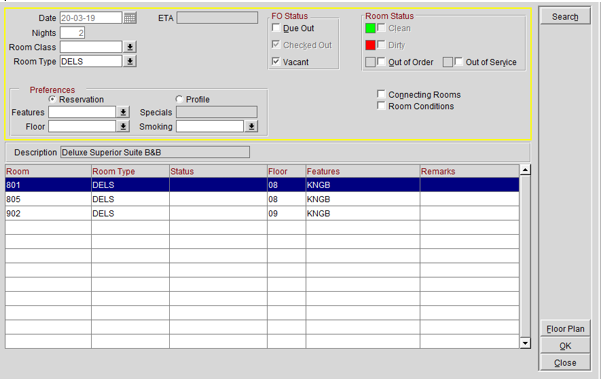
1.3.b.1. Available Rooms Search Screen will list all available Inspected Rooms for the date range and room type specified on the reservation, according to any Floor, Smoking and Room Feature Preferences attached.
1.3.b.2. If there are no Rooms available that meet all the above criteria, the search criteria can be amended accordingly by a process of elimination, until a suitable room is listed.
c) Highlight the room by clicking on the RHS of the HK Status column (Room and Room Type columns on the LHS of the HK Status column are hyperlinked and will therefore open the relevant configuration screens when selected)
d) Select OK to assign the room.
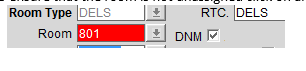
e) If you wish to ensure that the room is not unassigned click on and select the DNM flag
f) Save and Close out of the reservation screen
C. Batch Room Assigning
1. From the Main Splash page select PMS
2. Select the Front Desk Module
2.1. Either via the drop down or the icon
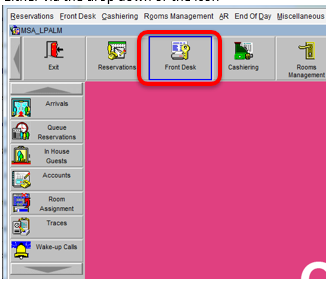
2.2. Select Room Assignment
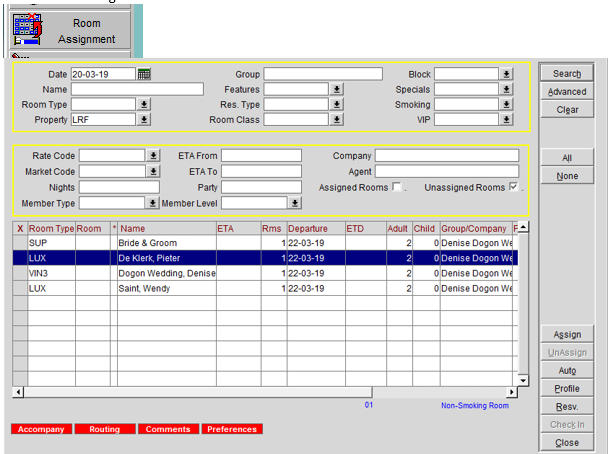
a) Advanced button allows further search filters:
b) Unassigned Rooms check box is selected to display only reservations that do not have a room number assigned, and is selected by default.
c) Assigned Rooms check box can be selected to also display reservations that have rooms assigned.
d) Floor and Smoking Preferences associated with the selected reservation are shown in blue type in the lower part of the Room Assignment screen.
e) Select the Assign button
2.2.e.1. A list of available rooms matching the criteria specified is displayed in the Rooms List screen.

2.2.e.2. Available Rooms Search Screen will list all available Inspected Rooms for the date range and room type specified on the reservation, according to any Floor, Smoking and Room Feature Preferences attached.
2.2.e.3. If there are no Rooms available that meet all the above criteria, the search criteria can be amended accordingly by a process of elimination, until a suitable room is listed.
f) Highlight the room the required room
g) Select OK to assign the room.
3. Repeat for each reservation.
·
Select the Unassign button to remove the
highlighted reservation's room number._
· You are able to edit the profile, reservation and check in the reservation from the Room Assignment screen, by selecting the respective button. You will be prompted with the Check In All screen, should multiple reservations be selected with an X for Check In.
D. Group Room Assigning
1. Select the Front Desk Module
1.1. Either via the drop down or the icon

1.2. Select Room Assignment
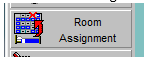
1.3. Enter the Group by Name or Block Code
a) Click on Search
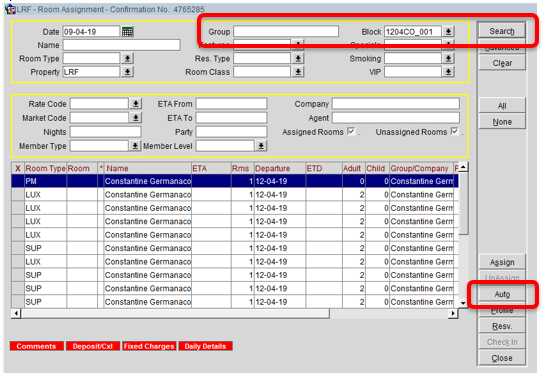
b) Select the Auto Button and the Automatic Room Assignment screen is displayed.
1.3.b.1. Select to either have Opera automatically Assign or Unassign rooms to all or only selected reservations.
1.3.b.2. When ‘Use Associated Preferences’ is selected, which it is by default, room assignment will be handled based on the preferences of each reservation and/or profile along with room status filter (Inspected is selected by default), and the Features, Smoking, and Floor fields are not available.
1.3.b.3. As soon as ‘Use Associated Preferences’ is unselected, the Features, Smoking, and Floor fields are then available. Any preference selected here is applied to all reservations that have been selected for auto room assignment.
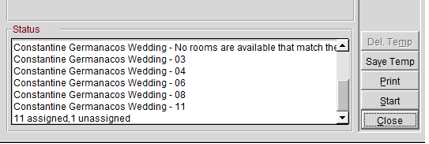
c) Select Start Button to start Auto Assign Process.
d) When complete the Status screen will update with a summary of what was assigned, what was not assigned, and a total number of each.