How To Complete a Walk-In Reservation
A. Introduction
When a guest arrives at the hotel and does not have a reservation but wished to check-in a Walk In reservation is made.
This must be done in a specific way in order to track and get statistical information.
B. Walk In Reservation
1. A walk reservation is started by selecting
1.1. Front Desk – Arrivals
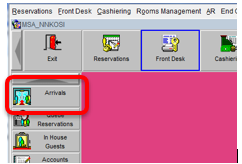
1.2. Select the Walk In Button
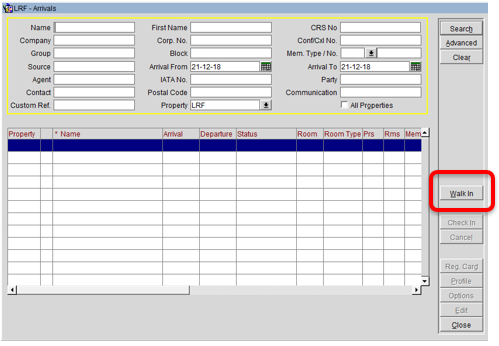
2. This option will return the Rate Query Screen in order to search for a valid Rate based on the fields completed
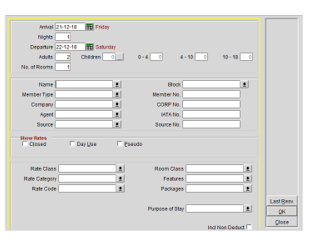
2.1. Nights
2.2. No. of Rooms
2.3. Adults
2.4. Children
2.5. Name – in Opera this is the Guest’s Surname
a) Type the Surname and press “Tab”. The Profile search screen will automatically open
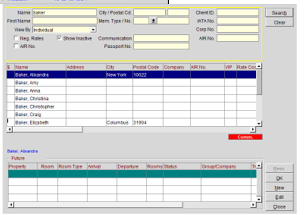
2.5.a.1. If the guest has stayed before select the relevant profile
2.5.a.2. If the guest has not stayed before click on NEW to create a profile
a) The following needs to be completed:
i. Last Name – in title case
ii. First Name – this must be the full name of the guest
iii. Title – each guest’s title must be filled in.
iv. Communications – Telephone contact detail of the guest – if available.
v. All other details need to be completed on check-in
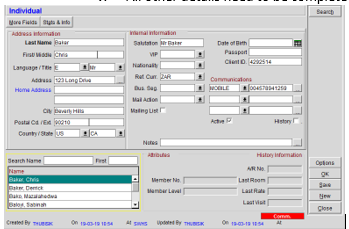
b) Click on OK to continue
2.6. Company Name – either type in the Company name; or tab to the next field and type in the CORP ID number. (Once you tab past this, the name of the company will auto populate.)
2.7. Travel Agent – either type in the Travel Agent name; or tab to the next field and type in the IATA number. (Once you tab past this, the name of the travel agent will auto populate.)
a) Where a Travel agent is making a reservation on behalf of a company – both the company name and the T/A name must be attached to the reservation.
b) This also ensures that the revenue is tracked properly
2.8. Once the following information is completed you would click on OK
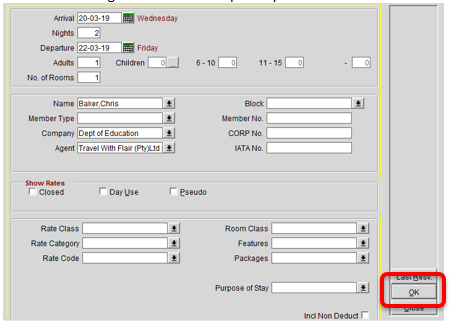
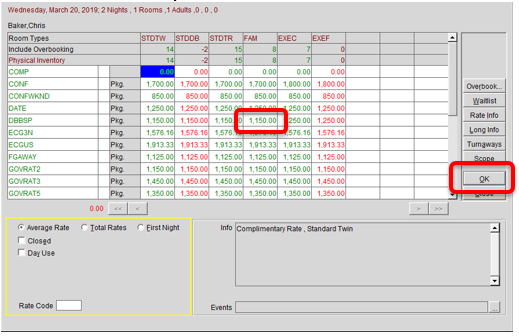
3. The next screen is the Rate Query Details Screen.
3.1. Here you would pick the rate appropriate to the guests request
a) Select the cell for the Rate for the required Room Type - a specific Walk In Rate may be applicable
b) Click on OK to continue to the Reservation Screen
4. The next screen , the Reservation Screen is where full details of the reservation are completed
4.1. This screen may vary from property to property as each hotel can determine what fields are required.
4.2. Based on the selections made on previous screens various fields will be automatically populated
a) The top section will pull from the Profiles that have been selected – these can be amended from the main screen if required, using the List of Values arrow buttons
b) The second section is the details of the guest stay and requests
4.3. The following mandatory information must be completed on the Reservation Screen:
a) Arrival Date
b) Departure Date
c) Room Type – the room type the guest will be occupying
d) Room Number – from the LOV
e) Rate Code – package/cost of the reservation
f) Res Type – to determine if the reservation is guaranteed - further details may be required dependent on type used
g) Market Code – type of guest/why they are staying
h) Source code – the WALK IN source code must be selected
i) Payment - to guarantee, further details may be required dependent on type used
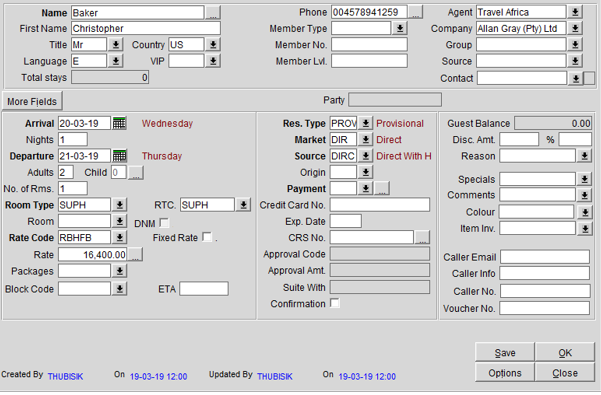
4.4. The following is completed as is required:
a) Origin Code – how the guest found out about the hotel
b) Specials - any Special Request that the guest requires
c) Features - any Room Features that the guest requires
d) Item Inventory – additional items the guest requests
e) Comments – like reservation comments etc.
f) Reservation Colour – needs to be selected for VIP, Frequent Guest, Assistance Required and Groups
g) Voucher No – purchase order/voucher for Travel Agent or Company bookings.
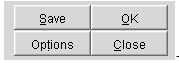
4.5. Complete the reservation
a) OK to save the reservation
4.6.
You will then be
prompted to check the guest in
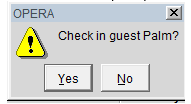
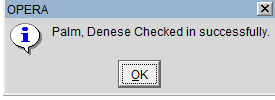
a) Select Yes to continue
5. Some properties will require a payment on arrival and the system might be set up to direct you to the Cashiering screen